Building a DIY rabbit hutch is one of the most rewarding weekend projects you can take on as a rabbit owner. I’ve built three hutches over the years — the first one took me twice as long as it should have because I used chicken wire instead of hardware cloth and had to redo the entire wire section. Don’t make that mistake. This DIY rabbit hutch guide covers everything I’ve learned: three complete design plans, exact material costs, a detailed 10-step building guide, winter-proofing, predator protection, and the specific products that actually work.
For pre-built alternatives, see our best rabbit cage guide. For sizing details specific to your rabbit’s breed, see rabbit cage size requirements.
Quick Answer: Should You Build or Buy a Rabbit Hutch?
Hutch size and design should match your rabbit’s breed — a Dutch Rabbit at 3.5-5.5 lbs needs less space than a giant breed.
| Factor | Build (DIY) | Buy (Pre-built) |
|---|---|---|
| Cost | $95-150 materials | $150-400 |
| Quality | Solid wood + hardware cloth | Often thin wire + weak joints |
| Customization | Fully custom to your space | Fixed dimensions |
| Time | 6-12 hours (one weekend) | 1-2 hours assembly |
| Tools needed | Saw, drill, staple gun | Screwdriver only |
| Sizing | Meets your rabbit’s exact needs | Often undersized |
My recommendation based on building three DIY rabbit hutches: if you have basic tools and a free weekend, build it. You’ll save money, get better materials, and end up with a DIY rabbit hutch that’s actually sized correctly for your rabbit. The number one problem with pre-built hutches (if you’d rather buy than DIY) is that they’re too small — many options under $100 provide only 4-6 square feet when the minimum for one rabbit is 12 square feet.
Minimum hutch size rule: 12 square feet (4 feet by 3 feet) for one rabbit, 24 square feet for two. Anything less leads to stress, obesity, and behavioral problems. For a complete rabbit setup guide beyond the hutch itself, see our rabbit setup guide.
Indoor vs Outdoor Rabbit Hutch: Which Is Better?
This is a decision that affects every aspect of your build, from materials to design to long-term maintenance. No single answer works for everyone, but the comparison below will help you decide based on your situation.
| Factor | Indoor Hutch | Outdoor Hutch |
|---|---|---|
| Climate control | Stable temperature, no weatherproofing needed | Must winter-proof and summer-cool |
| Predator protection | Minimal risk indoors | Heavy-duty wire + buried mesh needed |
| Size constraints | Limited by room space | Can build larger |
| Odor and ventilation | Needs good ventilation, may smell | Natural ventilation, less noticeable |
| Interaction | Easier daily contact | Requires going outside in all weather |
| Maintenance | Weekly spot clean | More frequent — weather debris, predators |
| Materials | Any untreated wood + hardware cloth | Must use exterior-grade sealant |
| Best for | Single house rabbits, apartment living | Multiple rabbits, breeders, rural homes |
My take on the indoor vs outdoor question: indoor hutches are simpler and safer for most pet rabbit owners. Outdoor hutches give more space but require significantly more maintenance and predator-proofing work. If you have the room indoors, I’d go with an indoor hutch. For more on keeping rabbits healthy in either setup, see our rabbit health guide.
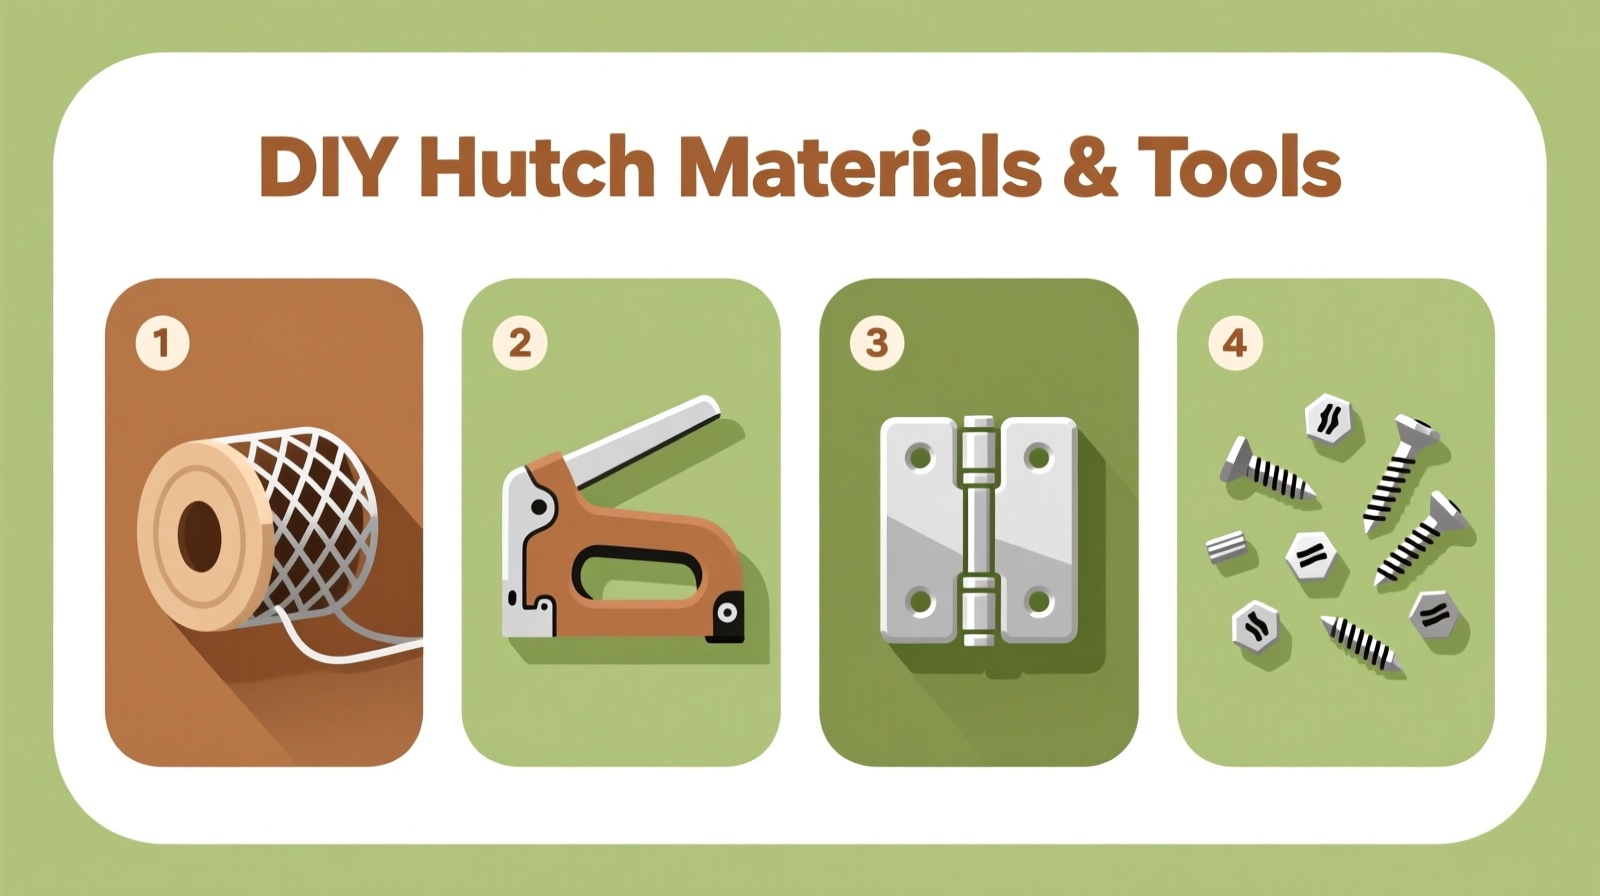
DIY Rabbit Hutch Materials and Tools Checklist
Getting the right materials is half the battle. I’ve learned through experience building three different DIY rabbit hutch designs that using quality materials from the start saves time and money compared to cutting corners and redoing work.
Materials for a standard 4 feet by 3 feet outdoor DIY rabbit hutch:
| Material | Quantity |
|---|---|
| 1/2-inch plywood (4 feet by 8 feet sheet) | 1 sheet |
| 2x4 lumber (8 feet boards) | 4-5 boards |
| Hardware cloth 1/2-inch (24 inches by 50 feet) | 1 roll |
| Deck screws (2 inch) | 1 box |
| T-strap hinges (4 inch, 6-pack) | 1 pack |
| Latches | 2-3 |
| Exterior sealant | 1 can |
| Total materials | $135-165 |
Tools:
| Tool | Estimated Cost |
|---|---|
| Arrow T50 Heavy Duty Staple Gun | $21 |
| Drill + bits | $30-50 |
| Circular saw or hand saw | $20-80 |
| Wire cutters | $8 |
| Tape measure, pencil, safety glasses | $15 |
| Total tools (if buying all) | $94-174 |
Wood safety: use only UNTREATED wood for any surface your rabbit can reach. Pressure-treated lumber contains toxic compounds if chewed. If using pressure-treated 2x4s for legs, ensure no chewable surfaces are exposed. For more on why investing in quality materials matters, see rabbit lifespan.
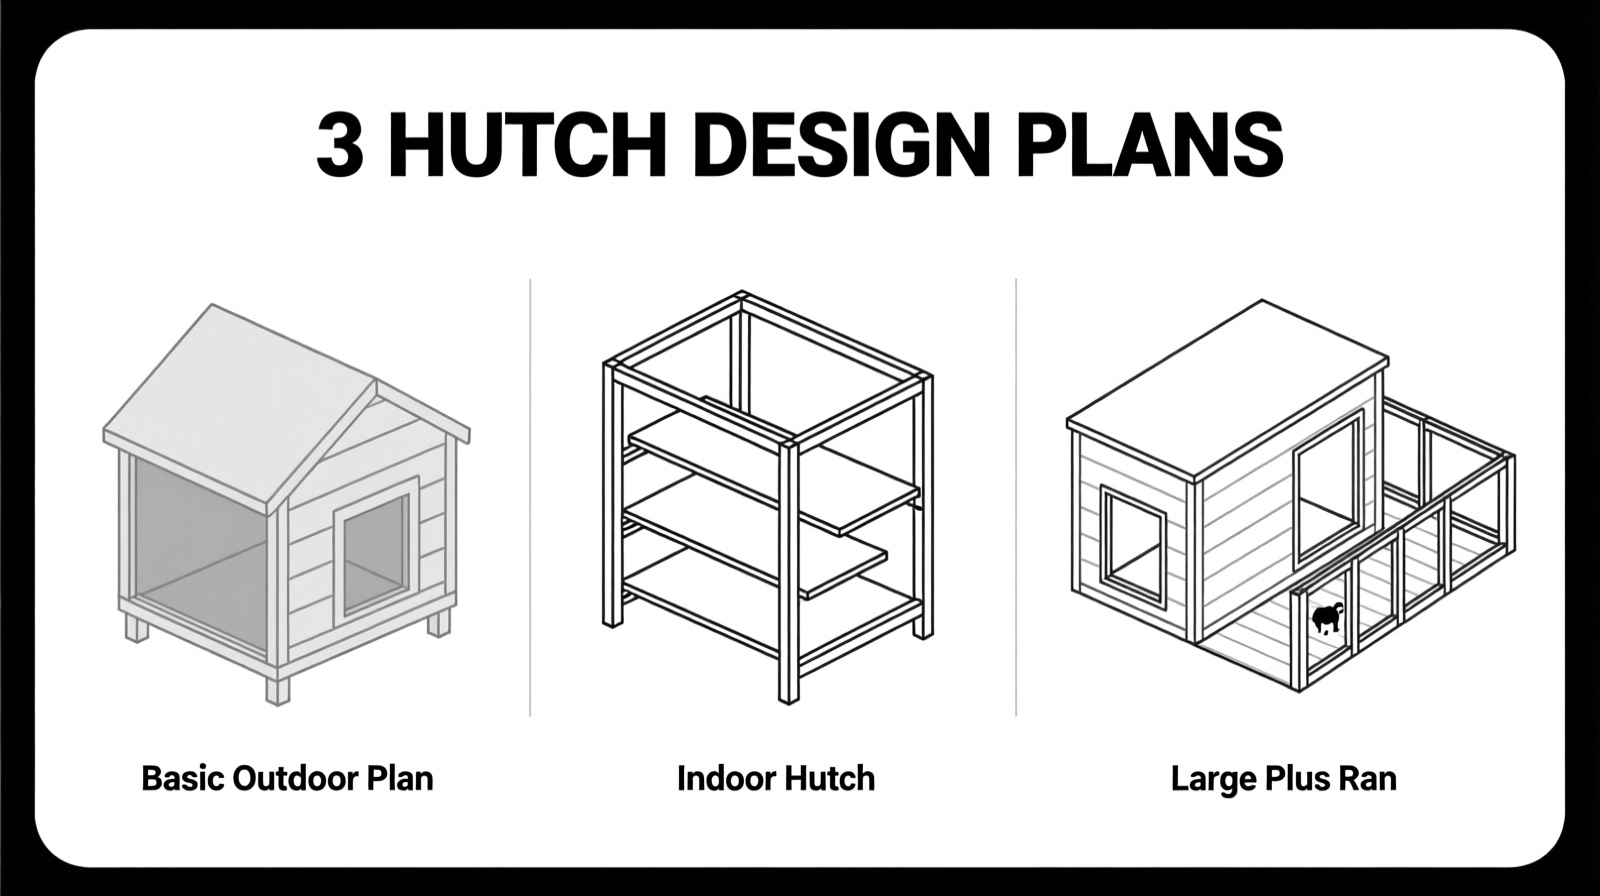
DIY Rabbit Hutch Designs: 3 Plans for Different Needs
Different rabbit owners need different designs. Here are three complete plans covering the most common situations, from a simple first-time build to a large multi-rabbit setup.
Plan A: Basic Outdoor Hutch (4 feet by 3 feet by 2 feet) — Best for first-time builders
This is the design I recommend starting with. Single-level with an enclosed sleeping box, half wire floor for ventilation and half solid plywood floor for resting. Hinged roof for easy cleaning access. Estimated materials cost $95-130, build time 6-8 hours. Suitable for 1-2 rabbits in moderate climates.
Plan B: Multi-Level Indoor Hutch (3 feet by 2 feet by 4 feet) — Best for small spaces
A two-tier hutch with ramp. Enclosed sleeping area, wire front panels, waterproof tray. $80-110, 8-10 hours. For 1 rabbit indoors.
Plan C: Large Outdoor Hutch with Run (6 feet by 3 feet by 3 feet plus 4 feet attached run) — Best for multiple rabbits
Spacious hutch connected to wire-enclosed run. Buried wire perimeter, asphalt shingle roof. $180-250, 12-16 hours. For 2-4 rabbits.
| Feature | Plan A (Basic) | Plan B (Indoor) |
|---|---|---|
| Rabbits | 1-2 | 2-4 |
| Floor space | 12 sq ft | 6+4 sq ft (2 levels) |
| Build time | 6-8 hours | 8-10 hours |
| Materials cost | $95-130 | $80-110 |
| Difficulty | Beginner | Intermediate |
| Indoor or Outdoor | Outdoor | Indoor |
| Predator-proof | Moderate | N/A |
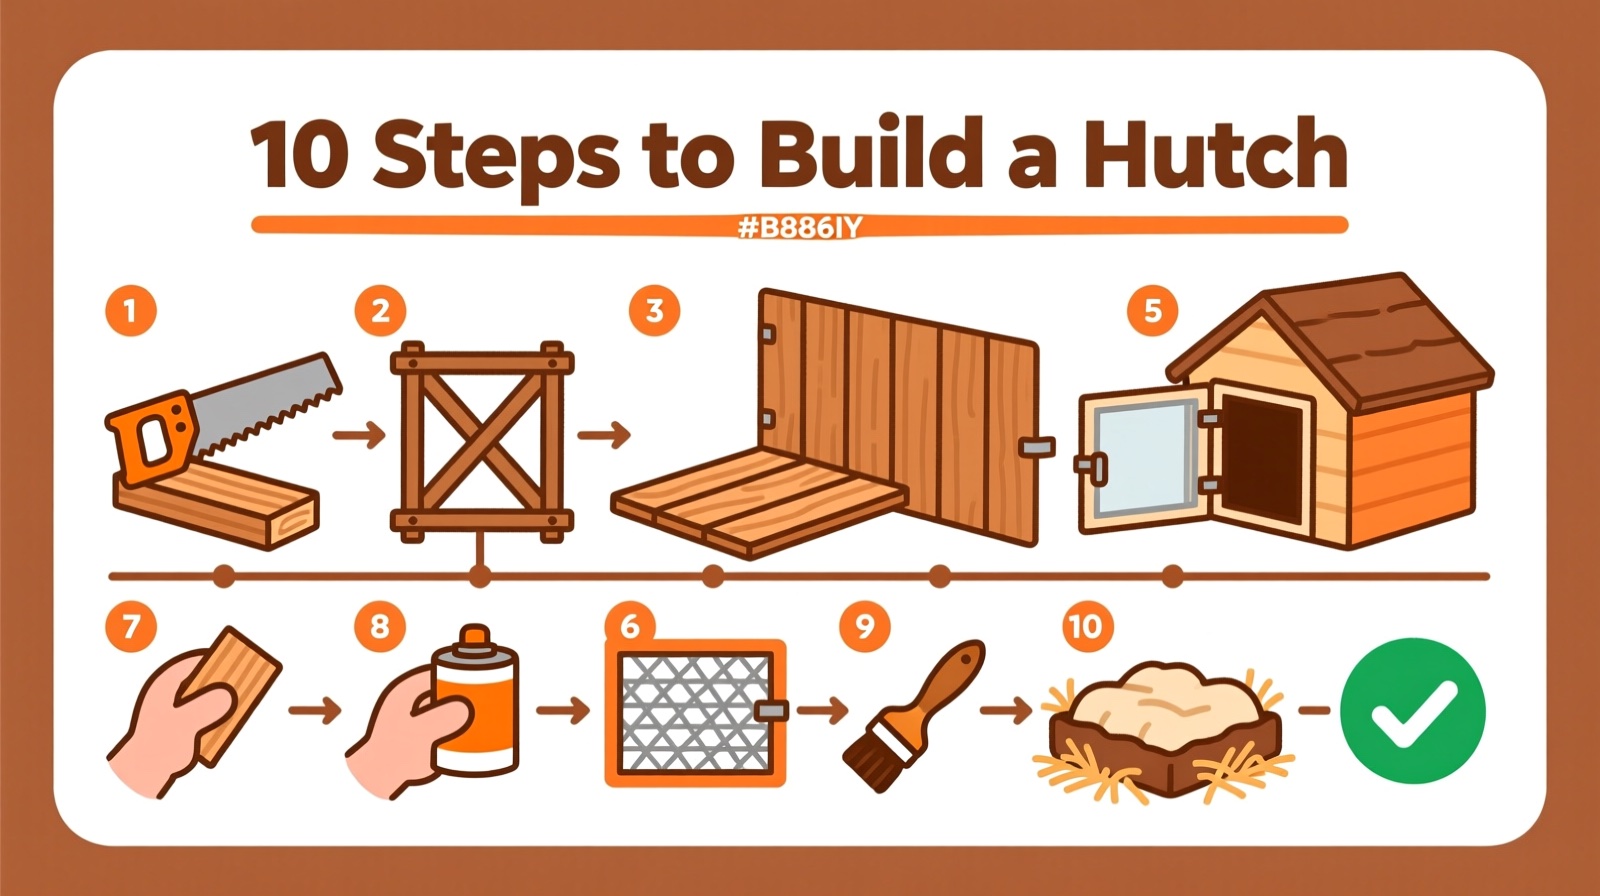
How to Build a Rabbit Hutch Step by Step
This is the core of the DIY rabbit hutch guide — detailed step-by-step instructions for Plan A, the basic outdoor hutch. I’ve built this exact design three times and refined the process to be as straightforward as possible.
Step 1: Cut the Frame Lumber (30 minutes)
Cut four 2x4 legs to 28 inches tall — this raises your DIY rabbit hutch off the ground for predator protection and moisture control. Cut floor joists: two 2x4s at 48 inches length (long sides), two at 33 inches inner width (short sides, accounting for the 2x4 thickness). Cut four roof support rafters at 48 inches each.
Step 2: Build the Floor Frame (20 minutes)
Assemble the floor joists into a rectangle using 2-inch deck screws, pre-drilling holes to prevent splitting. Attach 1/2-inch plywood to one half of the floor frame — this is the solid resting area that prevents sore hocks. Attach hardware cloth to the other half using the Arrow T50 staple gun, stapling every 2 inches along all edges. An all-wire floor causes sore hocks — always provide a solid section.
Step 3: Attach Legs and Add Bracing (20 minutes)
Screw the four legs to the inside corners of the floor frame using 3-inch deck screws. Add cross-bracing for stability and check level.
Step 4: Build the Back and Side Walls (30 minutes)
Cut plywood panels: one back panel at 48 inches by 24 inches, two side panels at 33 inches by 24 inches each. Attach to the frame with deck screws, pre-drilling all holes. Leave the entire front open — this is where the wire section and front door will go. The back and sides should be solid plywood for weather protection and to give your rabbit a sense of security.
Step 5: Build the Enclosed Sleeping Box (30 minutes)
Build a 16 inches by 16 inches by 16 inches box at one end of the hutch using plywood. This is your rabbit’s sleeping area — fully enclosed with solid plywood, solid floor, and a small 6 by 8 inch entrance. Add a hinged lid using T-strap hinges so you can check on your rabbit and clean the sleeping area without disturbing them.
Step 6: Wire the Front Section (20 minutes)
Cut hardware cloth to fit the open front area. Staple every 2 inches along all edges. Fold raw wire edges under or cover with trim strips. No gaps larger than 1/2 inch.
Step 7: Build and Hang the Front Door (20 minutes)
Frame a door from 2x2 lumber with hardware cloth. Attach with T-strap hinges and install a padlock-style latch — raccoons open simple latches.
Step 8: Attach the Roof (15 minutes)
Cut a plywood roof panel with 2-inch overhang. Attach with hinges along the back edge for easy cleaning access. Consider asphalt shingles for outdoor builds.
Step 9: Seal and Finish (15 minutes)
Apply pet-safe exterior sealant to all exposed wood. Let dry 24-48 hours. Sand rough edges and file sharp wire points.
Step 10: Add Accessories (10 minutes)
Mount a Little Giant water bottle ($17) on the wire section wall. Hang a metal frame hay feeder ($10) on the wall. Add a heavy ceramic food bowl and bedding in the sleeping box. Your DIY rabbit hutch is ready. For more on understanding whether your rabbit is comfortable in their new home, see our rabbit sounds guide — happy rabbits make soft tooth-purring sounds.
Rabbit Hutch DIY on a Budget
You don’t need to spend $150 to build a DIY rabbit hutch. With some resourcefulness, you can bring the cost down significantly.
How to build a DIY rabbit hutch for under $60:
| Material | Budget Option |
|---|---|
| Wood | Reclaimed pallets or shipping crates (free) |
| Wire mesh | Hardware cloth (buy only what you need) |
| Screws and hardware | Buy loose from hardware store bin |
| Sealant | Small can of exterior sealant |
| Total | $48-65 |
Where to find free wood: Facebook Marketplace frequently has free pallets listed, construction site offcuts are often available if you ask the site manager, old furniture can be disassembled for usable wood, and Craigslist’s free section is worth checking regularly.
Winter-Proofing Your Outdoor Rabbit Hutch
If your rabbit lives outdoors, winter-proofing your DIY rabbit hutch is not optional — it’s essential for your rabbit’s survival and comfort. Rabbits tolerate cold better than heat (their comfortable range is 30-85 degrees Fahrenheit), but the hutch itself needs modifications to handle freezing temperatures, wind, and precipitation.
7-step winter preparation checklist:
| Step | Task |
|---|---|
| Cover your DIY rabbit hutch with a waterproof tarp | Blocks rain and snow while allowing some airflow |
| Add extra straw bedding in sleeping box | Straw insulates better than hay because hollow stems trap air |
| Build or buy an insulated water bottle cover | Water bottles freeze quickly in cold weather |
| Create a windbreak on north and west sides | Plywood sheet or tarp secured to your DIY rabbit hutch |
| Raise hutch off ground if not already elevated | Cold ground radiates cold into your DIY rabbit hutch floor |
| Seal all gaps and cracks in the sleeping box | Eliminates drafts that strip body heat |
| Consider a heated pad under the sleeping box | Only for temperatures dropping below 20 degrees Fahrenheit |
Temperature guide for outdoor DIY rabbit hutches:
| Temperature | Action Needed |
|---|---|
| Above 40 degrees Fahrenheit | Normal operation, no special measures |
| 30-40 degrees Fahrenheit | Add extra straw bedding, check water twice daily |
| 20-30 degrees Fahrenheit | Windbreak plus extra bedding plus water bottle cover |
| Below 20 degrees Fahrenheit | Consider bringing indoors or adding a heat source |
DIY Rabbit Hutch Ideas and Design Inspiration
Beyond the three plans in this DIY rabbit hutch guide, there are several creative design approaches worth considering depending on your space and woodworking skill level.
| Design Idea | Description | Difficulty |
|---|---|---|
| Furniture-style hutch | Built into a bookshelf or cabinet to blend with home decor | Advanced |
| Stacked double hutch | Two hutches stacked vertically, ideal for housing 2+ rabbits separately | Intermediate |
| Hutch with attached run | Enclosed wire run area connected directly to the hutch for daily exercise | Intermediate |
| Pallet hutch | Entire hutch built from reclaimed shipping pallets | Beginner-Intermediate |
| Indoor pen plus hutch combo | Large exercise pen with a small sleeping DIY rabbit hutch inside it | Beginner |
| A-frame hutch | Triangular roof design that naturally sheds rain and snow | Intermediate |
Essential Hutch Accessories
A DIY rabbit hutch needs the right accessories to function properly. Here are the three essentials I recommend for every build, plus a pre-built alternative for readers who decide DIY isn’t for them.
| Accessory | Product | Price | Notes |
|---|---|---|---|
| Water bottle | Little Giant Cage Bottle | $17 | Mounts on wire mesh wall, clear design for checking water level |
| Hay feeder | Metal Frame Hay Feeder | $10 | Chew-proof metal construction, slanted design reduces hay waste |
| Pre-built alternative | GEGURI Wooden Hutch | $160 | For readers who decide not to DIY — includes water bottle and feeding trough |
Common Mistakes to Avoid
After building three DIY rabbit hutches and helping friends with theirs, these are the most common mistakes I see in DIY builds. Avoiding these will save you time, money, and potential harm to your rabbit.
| Mistake | Why It’s a Problem | How to Fix It |
|---|---|---|
| Using chicken wire | Too thin for predator protection, large gaps cause injuries, rabbits can chew through it | Use 1/2-inch hardware cloth exclusively |
| All-wire floor with no solid section | Causes sore hocks (painful foot ulcers) from constant wire contact | Half wire for ventilation, half solid plywood for resting |
| Hutch too small | Leads to stress, obesity, muscle weakness, and behavioral problems | Minimum 12 square feet per rabbit |
| No enclosed sleeping area | Rabbits need a dark, private space to feel secure and sleep | Build a fully enclosed sleeping box |
| Pressure-treated wood inside hutch | Contains toxic copper compounds if chewed | Untreated wood only for any chewable surface |
| Simple slide latches | Raccoons can open them — this is a known predator behavior | Use padlock-style latches or carabiner clips |
| No winter preparation | Frozen water bottles and cold stress can be fatal | Follow the winter-proofing checklist in this guide |
Frequently Asked Questions
Q: How much does it cost to build a DIY rabbit hutch?
A basic hutch costs $95-150 in materials. A budget DIY rabbit hutch with reclaimed wood can cost as little as $40-60. Compare that to quality pre-built hutches at $150-400 — building is the clear value winner.
Q: How big should a DIY rabbit hutch be?
Minimum 12 square feet per rabbit (4 feet by 3 feet), 24 square feet for two. Your DIY rabbit hutch must include an enclosed sleeping area plus 3-4 hours of daily exercise outside.
Q: What materials do you need to build a DIY rabbit hutch?
Essential materials: plywood for walls/floor, 2x4 lumber for the frame, 1/2-inch hardware cloth (galvanized after welding), deck screws, T-strap hinges, latches, and exterior sealant for outdoor builds. Always use untreated wood. Essential tools: drill, saw, staple gun, wire cutters.
Q: Is it cheaper to build or buy a DIY rabbit hutch?
A DIY hutch costs $95-150 and gives you custom sizing with proper materials. Pre-built hutches cost $150-400 and many budget options are too small. The tradeoff is time — 6-12 hours of work for a better build.
Q: Can rabbits stay in a DIY rabbit hutch outside in winter?
Yes, with proper winter-proofing. Rabbits handle cold better than heat (comfortable to 30 degrees F). Essential modifications: waterproof tarp, extra straw bedding, windbreak, draft-free sleeping box, and insulated water bottle cover. Never bring an outdoor rabbit suddenly indoors.
Q: How to build a DIY rabbit hutch step by step?
The build: cut 2x4 frame, build floor (half plywood/half hardware cloth), attach legs with bracing, build walls, construct sleeping box, wire front section, hang door with padlock latch, attach hinged roof, seal with pet-safe sealant, add accessories.
Q: What is the best wire for a DIY rabbit hutch?
1/2-inch hardware cloth (galvanized after welding) is the only wire to use. Chicken wire is not safe. Quality hardware cloth costs $50-65 for a 50-foot roll.
Q: How do I rabbit-proof a DIY rabbit hutch from predators?
Key predator-proofing: 1/2-inch hardware cloth on all sides, bury wire 12-18 inches underground, padlock latches, solid sleeping box, lockable roof, elevate 6+ inches off ground, remove food at night.