Setting up a chinchilla cage properly is one of the most important things you’ll do as a new owner. Chinchillas can live 15–20 years and spend most of that time inside their enclosure — so getting the setup right from day one directly affects their health, happiness, and lifespan. A poor chinchilla cage setup leads to bumblefoot from wet bedding, heatstroke from warm rooms, dental disease from lack of chew toys, and chronic stress from insufficient hiding spots.
This guide walks you through every step of the chinchilla cage setup process, from choosing the right cage to temperature control and cleaning schedules. You’ll learn exactly which products work, where to place everything, and how to maintain a healthy environment for your pet. For more foundational chinchilla care tips beyond cage setup, check out our full chinchilla care guide.
What Is a Proper Chinchilla Cage Setup?
A chinchilla cage setup is the complete arrangement of bedding, food, water, a dust bath area, hideouts, and enrichment items inside a tall, multi-level wire cage designed to replicate a chinchilla’s natural Andean mountain habitat. Unlike hamsters or guinea pigs, chinchillas are agile climbers that need significant vertical space — not just floor area — to stay active and mentally stimulated.
Proper setup matters because chinchillas are exceptionally long-lived small pets. With a chinchilla lifespan of up to 15–20 years, the cage becomes their permanent home for over a decade. Cutting corners on cage size, bedding safety, or temperature control creates compounding health problems that can shorten that lifespan considerably.
Here’s what a complete setup includes:
- A tall, multi-level wire cage with bar spacing no wider than 1 inch
- Safe bedding covering the bottom tray at least 2–3 inches deep
- Unlimited timothy hay and high-quality pellets in a designated feeding area
- A no-drip water bottle mounted at the right height
- A dust bath area for regular grooming
- At least two hideouts for sleeping and security
- Chew toys and enrichment for dental health and mental stimulation
- Cooling accessories to prevent heatstroke
This guide covers each of these elements in detail, with specific product recommendations and placement tips so you can set everything up correctly the first time.
How to Set Up a Chinchilla Cage — Step by Step
Follow these eight steps in order to build a complete, healthy environment for your chinchilla. Each step includes a recommended product and explains why placement matters.
Step 1: Choose the Right Cage
Start with the cage itself — the foundation of your entire chinchilla cage setup depends on having the right enclosure. A single chinchilla needs a tall, multi-level wire cage with a minimum footprint of 36×24×36 inches. Bar spacing should be no wider than 1 inch to prevent escapes. Avoid cages with plastic shelves or ramps, as chinchillas will chew through them and risk intestinal blockages.
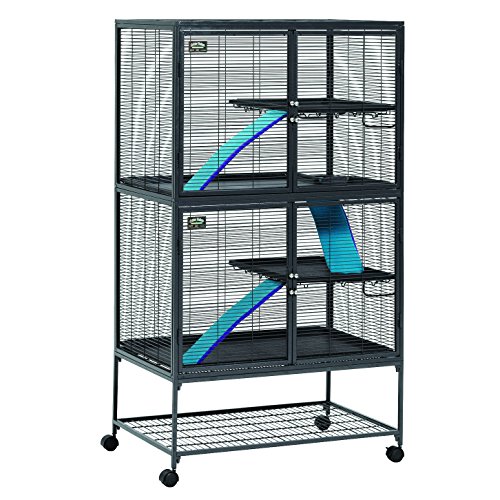
The MidWest Critter Nation Double Unit ($319.99) is widely regarded as the best cage for chinchillas. It measures 36×24×63 inches with two full levels, 1/2-inch horizontal bar spacing, full-width double doors for easy access, and three textured ramps with covers. The all-metal construction holds up to years of chewing. The only downsides are that assembly instructions aren’t clearly labeled and the cage is heavy to move once put together — so build it where you intend to keep it.
Check our full breakdown of the best chinchilla cages for comparison if you want to explore alternatives before committing to this size and price point.
Step 2: Add Bedding to the Bottom Tray
Once the cage is assembled, move on to the next essential part of your chinchilla cage setup: line the bottom tray(s) with safe bedding at least 2–3 inches deep. This layer absorbs urine, controls odor, and provides a soft surface that protects your chinchilla’s delicate feet from bumblefoot.
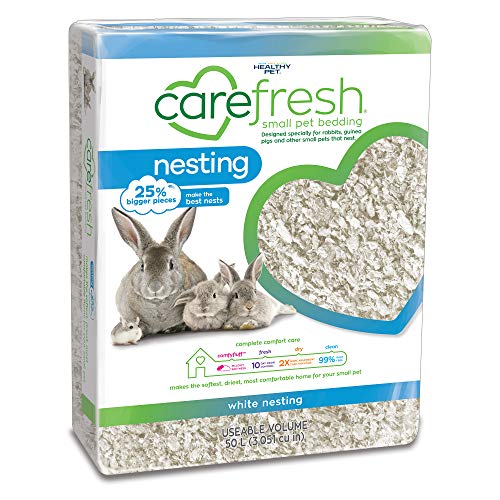
Carefresh White Nesting Paper Bedding ($28.99) is the top pick. It’s 99% dust-free, highly absorbent, and made from natural paper pulp — no aromatic oils or chemicals that irritate chinchilla respiratory systems. The 60L bag expands significantly when fluffed, so a single bag covers multiple changes for a standard cage. Learn about more chinchilla bedding options if you want to compare paper versus fleece liners versus wood shavings.
Spread the bedding evenly across the tray, paying extra attention to corners where chinchillas tend to urinate. Avoid creating deep piles in one corner — even layering throughout provides the best absorption and odor control.
Step 3: Set Up the Hay Feeder and Food Bowl
Chinchillas need unlimited access to timothy hay for healthy digestion and dental wear. Place a hay rack on one of the upper levels — not the bottom floor, where bedding and urine will contaminate the hay. Mount it at a height where your chinchilla can reach it comfortably while standing on the shelf below.
For pellets, use a heavy ceramic bowl that can’t be tipped over, placed on a shelf separate from the hay. Provide 1–2 tablespoons of high-quality pellets daily. Oxbow Garden Select Chinchilla Food ($18.39) is an excellent choice — a soy-free, vitamin-fortified pellet that chinchillas consistently eat well. For a full comparison of pellet brands and hay types, see our guides to the best chinchilla hay and best chinchilla food.
Keep the feeding area on the opposite side of the cage from the litter corner. Chinchillas naturally choose one corner as their bathroom, and separating food from waste prevents contamination.
Step 4: Install the Water Bottle
Chinchillas need constant access to fresh, clean water. Use a no-drip water bottle mounted on the outside of the cage with the sipper tube poking through the bars. Mount it at a height your chinchilla can reach from a shelf — roughly at their shoulder height when standing.
The Choco Nose Patented No-Drip Water Bottle ($12.49) uses a ball-bearing nozzle design that dramatically reduces dripping compared to standard bottles. Drip-free bottles keep the bedding underneath dry, which is critical for preventing fungal growth and bumblefoot. It comes with a spring attachment that fits most wire cages. Be aware that the ball mechanism can occasionally jam, so check the bottle daily by tapping the nozzle to confirm water flows freely. For more options, our best chinchilla water bottle guide covers alternatives.
Refresh the water completely every day, even if the bottle still has water remaining.
Step 5: Place the Dust Bath
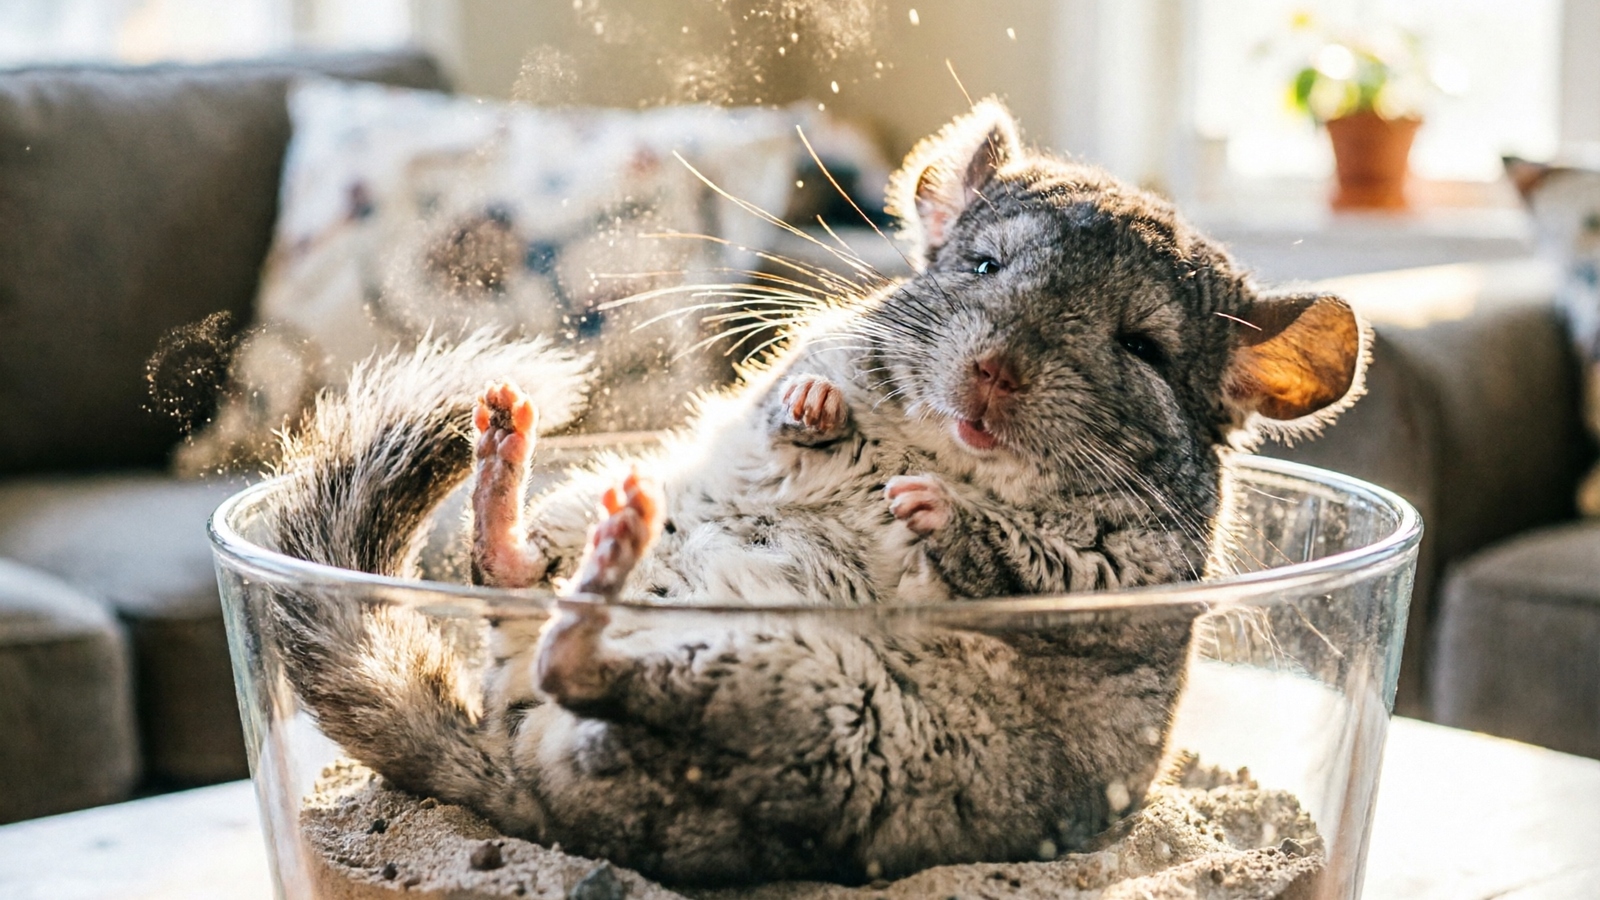
Dust bathing is how chinchillas keep their dense fur clean — they cannot be bathed with water. Set up a dust bath container on one of the middle or upper levels of the cage, where it’s easy for you to remove between bath sessions.
Fill the container with Oxbow POOF! Chinchilla Dust Bath ($11.49) — a 100% natural Blue Beauty Dust that’s recommended by exotic pet veterinarians. For the container itself, the Niteangel Small Animal Sand-Bath Box ($30.95) has a transparent acrylic design so you can watch your chinchilla bathe, plus a removable top for easy cleaning. The enclosed shape keeps dust from scattering outside the cage.
Remove the dust bath after each session. Leaving it in the cage full-time leads to over-bathing, which dries out the skin and irritates eyes. For a complete breakdown of dust bath routines and products, check our best chinchilla dust bath recommendations and our detailed chinchilla dust bath guide.
Step 6: Add Hideouts
Chinchillas are prey animals that need secure hiding spots in their chinchilla cage setup. Providing multiple shelterpots to feel safe, especially during daytime when they sleep. Provide at least two hideouts on different levels of the cage — this prevents territorial disputes if you house multiple chinchillas and gives your pet options for different temperatures and light levels.
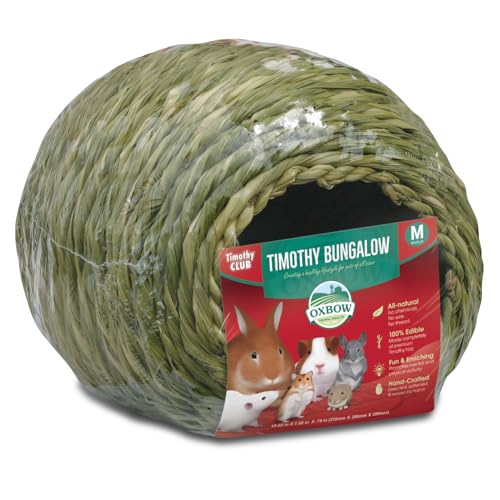
The Oxbow Timothy Hay Bungalow ($17.09) serves double duty as both a hiding spot and a chew toy. It’s made entirely from edible timothy hay with no additives, so your chinchilla can safely gnaw on it. Keep in mind that enthusiastic chewers may destroy it within a few weeks, so consider a wooden hideout as a more durable second option.
Place one hideout on a higher level (chinchillas prefer sleeping elevated) and one lower, closer to the bedding. Avoid hideouts with plastic parts — chinchillas will chew them and risk blockages.
Step 7: Add Chew Toys and Enrichment
Chinchilla teeth never stop growing, and without adequate chewing material, teeth can overgrow to the point of causing painful mouth infections and starvation. Scatter chew toys across multiple levels of the cage to encourage climbing and foraging behavior.
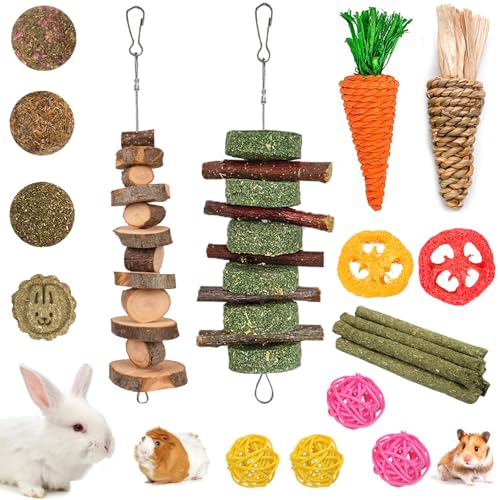
The Grddaef 20 PCS Natural Apple Wood Chew Toys ($11.99) provides a variety of natural apple wood sticks in different shapes and sizes. All pieces are free from paint, dye, and chemical additives. Rotate toys regularly to keep your chinchilla engaged — introduce new sticks every couple of weeks and remove ones that have been whittled down to splinters.
Beyond wood chews, consider adding hanging toys, willow bridges, and lava ledges to the cage. Variety prevents boredom and encourages natural climbing and jumping behavior. Our best chinchilla toys guide has more enrichment ideas.
Step 8: Install Cooling Accessories
Temperature control is the single most critical environmental factor in your chinchilla cage setup. These animals cannot sweat and are extraordinarily sensitive to heat — temperatures above 80°F can cause fatal heatstroke within hours. Place cooling stones on the cage floor and on elevated shelves so your chinchilla can choose where to cool down.
The Kaytee Chinchilla Chiller Granite Stone ($9.99) is a granite cooling stone that stays cool to the touch without refrigeration. Chinchillas instinctively lie on cool surfaces when they’re warm. Having multiple cooling stones (or swapping a frozen one in) gives you a buffer during hot days before the AC kicks in.
Chinchilla Cage Essentials Checklist
Use this checklist to make sure you have everything before bringing your chinchilla home. Missing even one category can create health or behavioral problems.
| Category | Item | Estimated Cost | Priority |
|---|---|---|---|
| Cage | MidWest Critter Nation Double Unit | $319.99 | Required |
| Bedding | Carefresh White Nesting Paper Bedding | $28.99 | Required |
| Food | Oxbow Garden Select Chinchilla Food | $18.39 | Required |
| Hay | Timothy hay (unlimited supply) | ~$8–15/bale | Required |
| Water Bottle | Choco Nose No-Drip Water Bottle | $12.49 | Required |
| Dust Bath Powder | Oxbow POOF! Dust Bath | $11.49 | Required |
| Dust Bath Container | Niteangel Sand-Bath Box | $30.95 | Required |
| Hideout | Oxbow Timothy Hay Bungalow | $17.09 | Required |
| Chew Toys | Grddaef Apple Wood Chew Toys | $11.99 | Required |
| Cooling | Kaytee Granite Chiller Stone | $9.99 | Required |
Estimated total for a complete chinchilla cage setup: approximately $460–490 depending on hay source and whether you add extra hideouts or enrichment items.

The cage itself represents roughly two-thirds of the total cost. While the upfront investment is significant, most accessories last months or longer before needing replacement. Pellets, hay, and bedding are your ongoing expenses at roughly $25–40 per month.
Bedding Options for Your Chinchilla Cage
Choosing the right bedding is a critical decision in any chinchilla cage setup because it directly impacts your chinchilla’s respiratory health and foot condition. Here’s a comparison of the main options:
Paper Bedding (Recommended)
Paper bedding like Carefresh is the safest all-around choice. It’s dust-free, highly absorbent, controls odor well, and contains no aromatic oils. The downsides are that it gets tracked outside the cage easily and needs full replacement weekly. This is the best option for first-time chinchilla owners who want a simple, safe solution.
Fleece Liners
Fleece liners are fabric pads that wick moisture away from the surface. They’re reusable, economical long-term, and create zero dust. However, they require washing every 3–5 days, and the initial setup of layered fleece with absorbent padding underneath takes more effort. Fleece works best for owners who don’t mind frequent laundry cycles.
Aspen Shavings
Aspen is a safe hardwood shaving with low dust and moderate absorption. It’s more affordable than paper bedding and has a natural wood scent that helps with odor. The tradeoff is that it doesn’t absorb as well as paper, and some chinchillas may track shavings outside the cage.
Kiln-Dried Pine
Kiln-dried pine shavings are safe because the kiln-drying process removes the toxic phenols found in fresh pine. It’s affordable and absorbent, but you must verify the product is specifically labeled as kiln-dried. Regular pine shavings are dangerous and should never be used.
Bedding to Avoid
- Cedar shavings — contain aromatic oils that cause respiratory damage and liver disease in small pets. This is non-negotiable.
- Non-kiln-dried pine — same phenol toxicity as cedar, just slightly less concentrated.
- Corn cob bedding — can cause intestinal blockages if ingested, molds easily when wet, and provides poor odor control.
| Bedding Type | Safety | Absorption | Dust Level | Odor Control | Cost |
|---|---|---|---|---|---|
| Paper (Carefresh) | Safe | High | Low | Good | $$ |
| Fleece Liners | Safe | Medium | None | Low | $ |
| Aspen Shavings | Safe | Medium | Low | Medium | $ |
| Kiln-Dried Pine | Safe | Medium | Low–Medium | Medium | $ |
| Cedar Shavings | Toxic | N/A | High | N/A | — |
| Corn Cob | Risky | Low | Medium | Poor | — |
For a deeper comparison with specific brand recommendations, see our full chinchilla bedding guide.
Cage Placement and Environment
Cage placement is one of the most overlooked aspects of a chinchilla cage setup. Where you put the cage in your home matters as much as what’s inside it. Chinchillas are crepuscular — most active at dawn and dusk — and they need a quiet, climate-controlled environment to maintain healthy sleep cycles and stress levels.
Ideal placement:
- A quiet room away from TV speakers, washing machines, and foot traffic
- Away from direct sunlight and windows (temperature fluctuations are dangerous)
- Against a wall rather than in the middle of the room (provides a sense of security)
- At room temperature between 60–70°F with humidity below 50%
Common mistakes to avoid:
- Near windows — sunlight creates hot spots, and glass provides no insulation from outdoor temperature swings
- In garages — extreme temperature fluctuations, exhaust fumes, and chemical storage make garages unsafe
- Near kitchens or bathrooms — humidity from cooking and showers raises moisture levels beyond safe thresholds
- In children’s bedrooms — daytime noise and activity disturb chinchilla sleep and increase stress
Chinchillas have sensitive hearing and startle easily. Loud, sudden noises cause chronic stress that suppresses the immune system over time. Choose a calm corner of a living room, office, or dedicated pet room where the temperature stays consistent year-round.
Also double-check bar spacing on any cage you purchase. Adult chinchillas need bar spacing no wider than 1 inch — anything larger and an escape is possible. The MidWest Critter Nation uses 1/2-inch spacing, which is safe even for young chinchillas.

Chinchilla Cage Temperature Control
Temperature is the most dangerous environmental factor for chinchillas. They cannot sweat, they lack efficient panting mechanisms, and their dense fur acts as insulation that traps heat. In temperatures above 80°F (27°C), a chinchilla can develop heatstroke and die within hours if not cooled down.
Warning Signs of Overheating
Recognizing overheating early saves lives. Watch for these symptoms:
- Red, flushed ears — the ears are the main heat dissipation surface; red ears signal the body is struggling to cool down
- Lethargy and lying flat — a chinchilla stretched out on its stomach with limbs splayed is trying to maximize surface contact to release heat
- Hot to the touch — ears, feet, and body feel noticeably warmer than usual
- Rapid, shallow breathing — indicates heat stress
- Drooling or wet around the mouth — a late-stage emergency sign
If you observe these signs, move the chinchilla to a cooler room immediately, place a cooling stone against their body, and contact an exotic veterinarian. Heatstroke progresses rapidly and is often fatal without intervention.
Cooling Solutions
- Air conditioning — the most reliable solution. Set your thermostat to 65–70°F during summer months
- Ceiling or oscillating fans — keep air circulating. Don’t point a fan directly at the cage; indirect airflow cools the room without creating drafts
- Granite cooling stones — keep one or two in the cage at all times during warm months. You can also place a spare stone in the freezer and swap it in during heat waves
- Closed blinds and curtains — block sunlight during peak daytime heat
- Frozen water bottles (external only) — place frozen water bottles near (but not inside) the cage to cool the surrounding air
Winter Considerations
Cold is less immediately dangerous than heat, but temperatures below 50°F can cause discomfort and sluggish behavior. Avoid placing the cage near drafty windows or exterior doors during winter. If your home gets cold at night, ensure the room stays above 50°F — a small space heater on a thermostat in the pet room works well.
Temperature Safety Facts
- Chinchillas overheat at 80°F — this is the hard upper limit, not a guideline
- Ideal range is 60–70°F — this is where chinchillas are most comfortable and active
- Humidity must stay below 50% — high humidity makes heat much more dangerous because evaporative cooling becomes ineffective
- Heatstroke can be fatal in under 2 hours — do not wait to see if your chinchilla “gets used to” warm temperatures
- Red ears are a red flag — check your chinchilla’s ears daily during summer
Cleaning and Maintenance Schedule
A consistent cleaning routine prevents odor, bacterial growth, and health problems. Here’s a practical schedule that balances thoroughness with manageable effort.
Daily Spot Cleaning (5–10 minutes)
- Remove visibly soiled bedding from the urine corner
- Check and refresh the water bottle — empty, rinse, and refill
- Add fresh hay to the feeder and remove any hay that’s been soiled or trampled into bedding
- Remove leftover pellets from the food bowl and wash if sticky
- Spot-clean around the dust bath area if any dust has spilled
Weekly Deep Cleaning (30–45 minutes)
- Replace all bedding in the bottom tray completely
- Wipe down shelves, ramps, and the cage frame with a damp cloth and pet-safe disinfectant
- Wash fleece liners (if using fleece instead of paper bedding)
- Clean the water bottle thoroughly with a bottle brush — the Choco Nose nozzle’s narrow design requires a small brush to prevent buildup
- Inspect hideouts for damage and replace if chewed beyond safe use
- Rotate chew toys — remove heavily chewed pieces and introduce fresh ones
Monthly Full Cage Cleaning (1–2 hours)
- Remove all accessories, shelves, and ramps from the cage
- Scrub the plastic bottom pan with pet-safe disinfectant
- Inspect the entire cage frame for loose bolts, sharp edges, or chew damage
- Deep-clean all accessories including hideouts, food bowls, and the dust bath container
- Let everything dry completely before reassembling
Dust Bath Schedule
Give your chinchilla access to a dust bath 2–3 times per week, for 15–20 minutes per session. Remove the bath container after each session — leaving it in the cage leads to over-bathing, eye irritation, and dry skin. Replace the dust powder every 2–3 weeks, or sooner if it looks clumpy or discolored.
Pro tip: Keep a second set of essentials — an extra water bottle, spare food bowl, and backup hideout — so you have something clean to swap in while the regular items are being washed. This reduces stress for your chinchilla during cleaning and prevents you from rushing the drying process.
Frequently Asked Questions
What do chinchillas need in their cage?
A multi-level wire cage (minimum 36×24×36 inches), safe paper bedding 2–3 inches deep, unlimited timothy hay in a rack, 1–2 tablespoons of quality pellets in a ceramic bowl, a no-drip water bottle, a dust bath area used 2–3 times per week, at least two hideouts on different levels, and several chew toys for dental wear. Cooling stones are essential in warm climates.
What bedding is best for chinchillas?
Paper bedding is the safest and most practical choice for chinchillas. Products like Carefresh are 99% dust-free, absorbent, and free from the aromatic oils found in wood shavings that can damage a chinchilla’s respiratory system. Aspen shavings and kiln-dried pine are acceptable alternatives, but cedar shavings are toxic and should never be used. Fleece liners work well for owners committed to frequent washing.
What temperature should a chinchilla cage be?
The ideal temperature range is 60–70°F with humidity below 50%. Chinchillas cannot sweat and begin to develop heatstroke at temperatures above 80°F, which can be fatal within hours. Red ears, lethargy, and rapid breathing are emergency signs requiring immediate cooling and veterinary attention.
How often should I clean a chinchilla cage?
Spot-clean daily by removing soiled bedding and refreshing food and water. Replace all bedding weekly during a deeper clean that includes wiping surfaces and washing the water bottle with a bottle brush. Once a month, do a full disassembly and scrub of the entire cage. Dust baths should be offered 2–3 times per week for 15–20 minutes, with the container removed between sessions.
Can chinchillas share a cage?
Same-sex pairs can share a cage if introduced gradually over several weeks in neutral territory. Each chinchilla needs its own hideout to prevent territorial disputes, and the cage must provide enough vertical space and multiple levels for them to establish separate areas. Never house a male and female together unless you intend to breed — chinchillas reproduce quickly and pregnancies are high-risk.
Conclusion
A proper chinchilla cage setup comes down to getting the fundamentals right: a spacious wire cage, safe bedding, unlimited hay and fresh water, a dust bath routine, multiple hideouts, chew toys, and strict temperature control below 80°F. These elements work together to create an environment where a chinchilla can thrive for its entire 15–20 year lifespan.
The biggest mistakes new owners make are using cages that are too small, choosing unsafe bedding, and underestimating how quickly heat becomes dangerous. Following the eight-step setup process in this guide and maintaining the cleaning schedule eliminates the most common health risks before they start.
Invest in quality products upfront — the cage, bedding, and accessories you choose on day one set the foundation for years of healthy, low-maintenance chinchilla care. For more specific product recommendations in any category, explore our full set of chinchilla care guides.