Training your bird is one of the most rewarding experiences you can have as a bird owner. Beyond the fun of teaching tricks, training provides essential mental stimulation, strengthens the bond between you and your bird, and helps manage behavioral problems. Whether you want your parrot to talk, perform tricks, or simply step up reliably, this comprehensive guide covers everything you need to know.
Why Train Your Bird
Benefits for Your Bird
Mental Stimulation:
- Birds are highly intelligent creatures that need mental challenges
- Training prevents boredom, which can lead to screaming, feather plucking, and aggression
- Learning new behaviors exercises their brain and keeps them engaged
- Wild birds constantly problem-solve for food and territory—training satisfies these instincts
Physical Exercise:
- Training provides physical activity, especially for flighted birds
- Flying to targets, climbing, and moving during training keeps birds active
- Important for preventing obesity in pet birds
Emotional Well-being:
- Training builds confidence in shy or fearful birds
- Positive interactions with you strengthen your bond
- Birds that are trained are generally happier and more secure
Behavioral Benefits:
- Trained birds are easier to handle (vet visits, cage cleaning, travel)
- Training reduces problem behaviors (screaming, biting, destruction)
- Provides appropriate outlet for natural behaviors
Benefits for You
- Deeper bond: Training creates trust and understanding
- Easier care: Birds that step up and recall are easier to manage
- Enjoyment: Watching your bird learn and succeed is incredibly rewarding
- Safety: A trained recall can save your bird’s life if they escape
Key Insight: Training isn’t just about tricks—it’s about communication, trust, and providing for your bird’s psychological needs.
What Birds Can Learn
Basic Behaviors (Most Birds)
Step Up:
- Bird steps onto your finger or hand on command
- Foundation for all handling
- Essential for safety and management
Step Down:
- Bird steps from your hand onto a perch or surface
- Important for cage returns and play sessions
Recall (Coming When Called):
- Bird flies or walks to you when called
- Safety essential for flighted birds
- Builds strong bond
Stay:
- Bird remains in place until released
- Useful for safety and management
Target Training:
- Bird touches a target stick with beak
- Foundation for many advanced behaviors
- Useful for guiding bird without force
Wave:
- Bird lifts foot and waves
- Cute trick that’s relatively easy to teach
Advanced Behaviors
Talking:
- Some species can learn to mimic words and phrases
- African greys, budgies, cockatiels, some conures, Amazons, quakers
- Requires patience and consistent practice
Complex Tricks:
- Basketball (putting ball in hoop)
- Ring toss
- Color discrimination
- Shape identification
- Retrieving objects
Free Flight Training:
- Advanced outdoor flight training
- Requires expert guidance
- Only for experienced trainers
Species-Specific Capabilities
Birds That Commonly Talk:
- African Grey Parrots (best talkers)
- Budgies (parakeets)
- Cockatiels
- Some Conures (green-cheeked, sun)
- Amazon Parrots
- Quaker Parrots
- Indian Ringnecks
- Eclectus Parrots
Birds That Rarely or Don’t Talk:
- Canaries
- Finches
- Doves
- Lovebirds
- Parrotlets
- Some conure species
Note: Even within talking species, individual birds vary. Some African greys never talk, while some budgies develop large vocabularies. Don’t get a bird solely for talking ability.
Prerequisites for Training
Before You Start
1. Build Trust First:
- If your bird is not hand-tame, work on taming before training
- Bird should be comfortable with your presence
- Should accept treats from your hand
- Should not be afraid of you
2. Understand Your Bird:
- Know their favorite treats
- Understand their body language
- Recognize signs of stress vs. engagement
- Know their activity patterns (most birds are active in morning/evening)
3. Have Realistic Expectations:
- Training takes time (weeks to months for reliable behaviors)
- Some birds learn faster than others
- Young birds generally learn faster, but older birds can learn too
- Short sessions are more effective than long ones
Supplies Needed
Essential:
- Target stick: Wooden dowel, chopstick, or commercial target stick
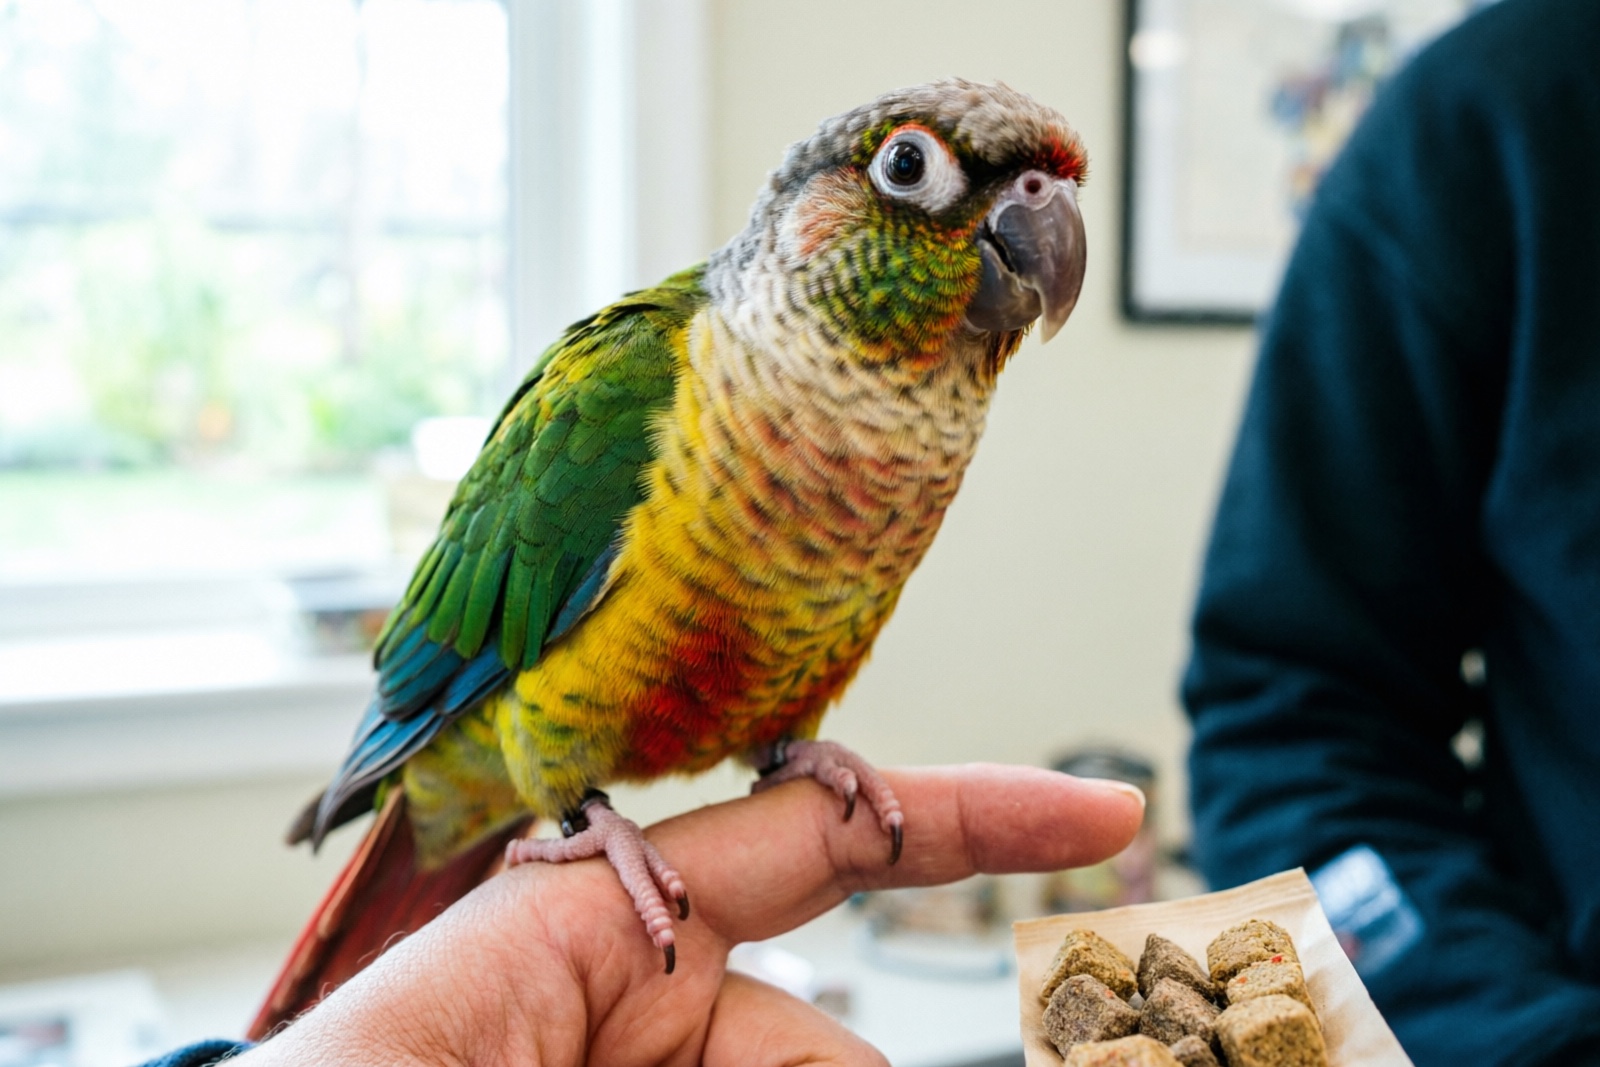
- Treats: Favorite healthy snacks (millet, seeds, nuts, dried fruit—species-appropriate)
- Clicker: Optional but helpful for marking correct behavior — a training clicker works well
- Patience: Most important tool!
Optional but Helpful:
- T-stand or training perch: Gives bird designated spot for training — a tabletop T-stand is a practical choice
- Training journal: Track progress, note what works
- Video recording: Record sessions to review technique
Treats for Training
Good Training Treats (small, high-value):
- Millet spray (for small birds)
- Sunflower seeds (in moderation)
- Small pieces of nut (almond, walnut)
- Dried fruit (small pieces)
- Small pieces of fresh fruit
- Commercial training treats
Avoid:
- ❌ Chocolate (toxic)
- ❌ Avocado (toxic)
- ❌ Caffeine (toxic)
- ❌ Alcohol (toxic)
- ❌ High-salt foods
- ❌ Large treats (take too long to eat, slow training)
Tip: Reserve special treats for training only. This keeps them high-value and motivating.
Step 1: Target Training (Week 1-2)
What Is Target Training?
Target training teaches your bird to touch a specific object (target stick) with their beak. This is foundational for many other behaviors because you can use the target to guide your bird without force.
How to Teach Target Training
Setup:
- Choose a quiet location with minimal distractions
- Have bird in cage or on T-stand
- Have target stick and treats ready
Process:
Day 1-3: Introduction
- Hold target stick still near bird (through cage bars if bird is nervous)
- Don’t move the stick—let bird approach at their pace
- If bird shows interest (looks at stick, leans toward it), wait
- If bird touches stick with beak, immediately say “Good!” and offer treat
- If bird bites stick hard, don’t pull away (may scare them)—hold steady
- If bird ignores stick, try again later
Day 4-7: Building Consistency
- Continue presenting target stick
- Bird should start approaching stick voluntarily
- Reward every touch with praise and treat
- Start saying “touch” or “target” as bird touches stick
Week 2: Adding Duration and Distance
- Hold target stick slightly further from bird
- Bird should move toward stick to touch it
- Gradually increase distance
- Practice in different locations (cage, T-stand, play gym)
Success Indicators
- ✅ Bird approaches target stick voluntarily
- ✅ Touches stick gently with beak
- ✅ Stays calm during training
- ✅ Takes treats from you
- ✅ Moves toward target from various distances
Troubleshooting
Bird is afraid of target stick:
- Hold stick farther away initially
- Let bird observe stick without pressure
- Place stick near favorite treats
- Try different type of stick (wooden vs. plastic)
Bird bites stick hard:
- Don’t pull away (may reinforce biting)
- Use sturdier stick
- Say “gentle” calmly
- Reward soft touches more than hard bites
Bird ignores stick:
- Try higher-value treats
- Ensure bird is hungry (train before mealtime)
- Make sure environment isn’t too distracting
- Try shorter sessions
Step 2: Step-Up Command (Week 2-3)
Why Step-Up Is Essential
Step-up is the most important behavior your bird will learn:
- Allows you to move bird safely
- Essential for vet visits
- Foundation for handling and bonding
- Safety behavior (can ask bird to step up from dangerous situations)
How to Teach Step-Up
Prerequisites:
- Bird should be comfortable with your hand nearby
- Bird should take treats from your hand
Process:
Day 1-3: Luring with Target
- Have bird on T-stand or stable perch
- Hold target stick behind your index finger (finger extended horizontally)
- Bird must step onto your finger to reach target
- As bird steps up, say “step up” clearly
- Immediately reward with treat and praise
Day 4-7: Fading the Target
- Present finger without target stick
- Say “step up”
- If bird steps up, reward enthusiastically
- If bird doesn’t step up, show target briefly, then hide it
- Gradually use target less and less
Week 2-3: Generalizing
- Practice step-up in different locations
- Practice with different people (if bird is comfortable)
- Practice step-down (from hand to perch)
- Add duration (bird stays on hand for a few seconds before treat)
Correct Technique
Your Hand Position:
- Index finger extended horizontally
- Other fingers curled under
- Thumb tucked against index finger (not sticking up)
- Hand steady, at bird’s chest level
Presenting to Bird:
- Touch bird’s lower belly gently, just above legs
- Say “step up” in friendly, encouraging voice
- Don’t push—let bird choose to step up
- Most birds will step up reflexively when belly is touched
Troubleshooting
Bird refuses to step up:
- Go back to using target stick as lure
- Ensure bird is comfortable with your hand
- Try higher-value treats
- Practice when bird is hungry (before mealtime)
- Never force—this creates fear
Bird bites when asked to step up:
- Don’t react dramatically (no yelling)
- Gently return bird to perch
- Try again later
- Assess: Is bird afraid? Tired? Not hungry?
- Build more trust before training
Bird steps up but immediately steps down:
- Reward bird for staying on hand (give treat while on hand)
- Increase value of staying (treats, attention)
- Practice holding bird for longer periods
Step 3: Clicker Training Introduction (Week 3)
What Is Clicker Training?
Clicker training is a form of operant conditioning that uses a distinct sound (the click) to mark the exact moment your bird does something right. The click tells the bird “that behavior earned a treat.”
How It Works:
- Bird performs behavior
- You click immediately (within 1-2 seconds)
- You give treat
- Bird learns: Click = I did something right = treat coming
Advantages of Clicker Training
- Precise: Marks exact moment of correct behavior
- Clear: Bird understands exactly what earned the treat
- Fast: Accelerates learning
- Fun: Birds enjoy the “game”
- No force: Based on positive reinforcement
How to Start Clicker Training
Step 1: “Charging” the Clicker (Day 1)
Before using clicker for training, teach bird what the click means:
- Click the clicker
- Immediately give treat
- Repeat 10-20 times
- Bird learns: Click sound = treat is coming
Test: Click when bird isn’t expecting it. If bird looks at you expectantly for treat, clicker is “charged.”
Step 2: Using Clicker with Known Behavior (Day 2-3)
- Ask for behavior bird already knows (target touch or step-up)
- When bird performs behavior, click immediately
- Give treat
- Repeat
Step 3: Using Clicker for New Behaviors (Day 4+)
Now you can use clicker to teach new behaviors:
- Wait for bird to offer behavior (or lure/guide them)
- Click the exact moment they do the behavior
- Give treat
- Repeat until bird offers behavior reliably
- Add cue word (e.g., “wave”) just before behavior
Clicker Tips
- Click during the behavior, not after
- One click = one treat (always reward after clicking)
- Keep training sessions short (5-10 minutes)
- If you click by mistake, still give treat (maintains trust in clicker)
- Clicker is a tool—you can phase it out once behavior is learned
Step 4: Teaching “Wave” (Week 4-5)
Why Teach Wave?
Wave is a fun, relatively easy trick that:
- Builds on step-up behavior
- Provides mental stimulation
- Is cute for showing friends and family
- Strengthens training relationship
How to Teach Wave
Method 1: Capturing Natural Behavior
- Watch bird carefully during regular interactions
- When bird lifts foot naturally (often while preening or stretching), say “wave” and click/treat
- Repeat whenever you see foot lift
- Bird learns: Lifting foot when I say “wave” = treat
Method 2: Luring
- Have bird on T-stand or perch
- Present finger as if asking for step-up
- Don’t let bird actually step up
- As bird lifts foot, say “wave” and click/treat
- Withdraw finger before bird steps onto it
- Repeat, gradually requiring higher foot lift
Method 3: Shaping (for Advanced Trainers)
- Click/treat any foot movement
- Then only click/treat foot lift
- Then only click/treat higher foot lift
- Finally, only click/treat full wave (foot up, extended)
Adding the Cue
- Say “wave” just before bird lifts foot
- Click/treat when bird waves
- Practice 10-15 times per session
- Eventually, bird will wave when they hear “wave”
Troubleshooting
Bird tries to step up instead of wave:
- Withdraw finger quickly
- Only reward foot lift, not full step-up
- Try holding finger slightly farther away
Bird doesn’t lift foot:
- Try Method 1 (capturing natural behavior)
- Watch for foot lift during preening
- Some birds don’t lift feet much—try different trick
Step 5: Recall Training (Week 5-8)
Why Recall Is Critical
Recall (coming when called) is potentially life-saving:
- If bird escapes, recall can bring them back
- Allows safe outdoor flight (for experienced trainers)
- Builds strong bond and trust
- Provides excellent exercise for flighted birds
Safety Note: Only allow flighted birds outdoors with professional guidance. Most pet birds should have recall training indoors for safety.
How to Teach Recall
Prerequisites:
- Bird should be comfortable with you
- Bird should know step-up
- Bird should be flighted (feathers not clipped) or able to walk/fly to you
Step 1: Short Distance Recall (Week 5)
- Have bird on T-stand or perch, close to you (1-2 feet)
- Show treat
- Call bird’s name enthusiastically: “[Bird’s name], come!”
- Bird should step or fly to your hand
- Click/treat and praise enthusiastically
- Repeat 10-15 times per session
Step 2: Increasing Distance (Week 6)
- Gradually increase distance (3 feet, 5 feet, 8 feet)
- Call bird’s name + “come”
- Reward bird for coming to you
- Practice in different locations in your home
Step 3: Adding Distractions (Week 7-8)
- Practice recall with mild distractions (TV on, other people in room)
- Gradually increase distraction level
- Only move to more distracting environments when bird is reliable
- Always reward recall with high-value treats
Step 4: Generalizing (Week 8+)
- Practice recall in different rooms
- Practice recall from different people
- Practice recall at different times of day
- Make recall fun—use enthusiastic voice, big rewards
Troubleshooting
Bird doesn’t come when called:
- Reduce distance
- Use higher-value treats
- Make sure bird isn’t tired or distracted
- Practice more in low-distraction environment
- Never call bird for something unpleasant (e.g., to put them in cage)
Bird comes sometimes but not others:
- Increase value of reward for coming
- Practice more frequently
- Ensure you’re calling in consistent, enthusiastic tone
- Rule out: Is bird tired? Sick? Distracted?
Advanced: Teaching Your Bird to Talk
Which Birds Can Talk?
Excellent Talkers:
- African Grey Parrots (vocabulary of 1,000+ words possible)
- Amazon Parrots (Yellow-naped, Double Yellow-headed, Blue-fronted)
Good Talkers:
- Budgies (some develop large vocabularies)
- Quaker Parrots
- Indian Ringnecks
- Eclectus Parrots
Moderate Talkers:
- Cockatiels (males more than females)
- Some Conures (green-cheeked, sun)
- Senegal Parrots
Rarely or Don’t Talk:
- Canaries, Finches (songbirds, not mimics)
- Doves
- Lovebirds
- Parrotlets
How to Teach Talking
1. Start with Simple Words:
- Bird’s name
- “Hello”
- “Step up”
- “Pretty bird”
- “Whatcha doing?”
2. Use Enthusiastic, Clear Voice:
- Speak clearly and consistently
- Use same tone and pronunciation each time
- Birds respond to enthusiasm and emotion
3. Associate Words with Actions:
- Say “step up” every time bird steps up
- Say “hello” when you enter room
- Say “want a treat?” when offering food
- This helps bird understand word meanings
4. Reward Attempts:
- If bird makes sound that resembles word, reward!
- Don’t wait for perfect pronunciation
- Bird will refine with practice
5. Keep Sessions Short:
- 5-10 minutes of focused talking practice
- More frequently is better than longer sessions
6. Use Repetition:
- Repeat target word 5-10 times per session
- Say word in context (e.g., “Hello!” when greeting)
- Use word throughout day, not just in training sessions
7. Use Audio Recordings:
- Record yourself saying target words
- Play recording when you’re not home
- Some birds learn from recordings
8. Be Patient:
- Some birds talk within weeks
- Others take months or years
- Some never talk despite your best efforts
- Don’t pressure bird—talking should be fun
Common Mistakes
- ❌ Repeating words too fast: Speak slowly and clearly
- ❌ Using too many words at once: Focus on 1-2 words at a time
- ❌ Expecting quick results: Talking takes time and patience
- ❌ Not rewarding attempts: Reward any approximation of word
- ❌ Pressuring bird: Creates stress and may reduce talking
Behavior Modification Through Training
Common Behavioral Problems
Screaming:
- Cause: Boredom, attention-seeking, morning/evening vocalization (normal), stress
- Training solution: Teach “quiet” or “inside voice” command
- Management: Provide enrichment, ignore screaming, reward quiet behavior
Biting:
- Cause: Fear, territorial behavior, hormonal, learned behavior
- Training solution: Build trust, train “gentle” command, redirect to toys
- Management: Don’t react dramatically (reinforces biting), identify triggers
Feather Plucking:
- Cause: Medical issues, stress, boredom, skin problems
- Training solution: Provide mental stimulation, enrichment
- Management: See vet first to rule out medical cause, provide foraging opportunities
Aggression:
- Cause: Fear, territoriality, hormonal, lack of socialization
- Training solution: Build trust, train basic behaviors, use positive reinforcement
- Management: Identify triggers, avoid punishment, consult avian behaviorist
Training Principles for Behavior Modification
- Never Punish:
- Punishment creates fear, damages trust
- Birds don’t understand punishment the way mammals might
- Use positive reinforcement instead
- Ignore Undesirable Behavior:
- Don’t reward screaming with attention
- Turn away from biting bird (don’t yell or jerk away)
- Withdraw attention calmly
- Reward Desired Behavior:
- Praise and treat when bird is quiet
- Reward gentle beak interactions
- Reinforce behaviors you want to see more of
- Redirect:
- If bird screams, offer toy or start training session
- If bird bites, redirect to chew toy
- Give bird appropriate outlet for energy
- Be Patient:
- Behavior change takes time (weeks to months)
- Consistency is key
- Celebrate small improvements
If behavior is severe or persistent, consult an avian behaviorist or vet.
Training Tips by Species
Parakeets (Budgies)
- Fast learners: Can learn tricks and talking
- Short sessions: 5-10 minutes ideal
- Good for: Target training, step-up, recall, simple tricks, talking
- Tips: Males generally talk more than females
Cockatiels
- Intelligent: Enjoy learning tricks
- Can learn: Target training, step-up, recall, wave, talking (males more than females)
- Social: Bond closely with owners
- Tips: Whistling often comes before talking
Conures
- Smart and active: Need lots of mental stimulation
- Good for: Target training, step-up, recall, foraging
- Natural behaviors: Provide shredding, foraging opportunities
- Tips: Green-cheeked conures are quieter; sun conures are louder
African Greys
- Highly intelligent: Can learn complex concepts
- Sensitive: May be cautious, need patient approach
- Excellent talkers: Large vocabularies possible
- Tips: Provide mental challenges, avoid repetition boredom
Lovebirds
- Smart but can be nippy: Patient training needed
- Good for: Target training, step-up
- Don’t typically talk: Focus on tricks instead
- Tips: Bond strongly with owners, may be territorial
Training Do’s and Don’Ts
DO
- ✅ Keep sessions short (5-15 minutes)
- ✅ End on positive note (stop before bird gets frustrated)
- ✅ Use high-value treats (reserve special treats for training)
- ✅ Be patient (training takes time)
- ✅ Practice daily (consistency is key)
- ✅ Adapt to your bird (every bird is different)
- ✅ Have fun (training should be enjoyable for both)
- ✅ Build trust first (tame bird before advanced training)
- ✅ Watch for stress signs (stop if bird seems tired or frustrated)
DON’T
- ❌ Punish or yell (creates fear, damages trust)
- ❌ Force behavior (birds resist force)
- ❌ Train when bird is tired (mornings and evenings are best)
- ❌ Skip trust-building (foundation for all training)
- ❌ Give up (if frustrated, take a break and try again)
- ❌ Expect overnight results (training takes weeks to months)
- ❌ Train with distractions (start in quiet environment)
- ❌ Use large treats (take too long to eat, slow training)
Summary: Training Checklist
Foundation (Weeks 1-3)
- Build trust and hand-tame if needed
- Target training (touch stick with beak)
- Step-up command (reliable)
- Introduce clicker (optional)
Basic Behaviors (Weeks 3-6)
- Step-down command
- Wave trick
- Stay command
- Recall (short distance)
Advanced (Weeks 6+)
- Recall (longer distances)
- Talking (if species-appropriate)
- Complex tricks
- Behavior modification
Frequently Asked Questions (FAQ)
1. How long does it take to train a bird?
Basic behaviors: 2-4 weeks for reliability Advanced tricks: 2-3 months Talking: Months to years (varies greatly by individual) Key: Consistency matters more than speed
2. Can all birds learn to talk?
No. Only certain species talk, and even within those species, individuals vary. African greys, budgies, cockatiels, some conures, and Amazons are most likely to talk.
3. What’s the best age to start training?
Young birds (recently weaned) learn fastest, but older birds can absolutely learn. It may take longer, but training benefits birds of all ages.
4. My bird bit me during training. What should I do?
Don’t react dramatically. Gently return bird to perch, end session calmly. Try again later. Analyze: Was bird scared? Tired? Not hungry? Adjust approach.
5. How often should I train my bird?
Daily is ideal, even if just 5 minutes. Consistency is more important than session length. Two 5-minute sessions are better than one 10-minute session.
6. What if my bird seems afraid of training?
Go slower. Build more trust. Start with just handing treats through cage bars. Don’t force. Let bird set the pace.
7. My bird screams during training. Why?
Frustration, fear, or excitement. Identify cause: Are you moving too fast? Is environment too stimulating? Is bird tired? Adjust accordingly.
8. Can I train my bird outdoors?
Only with extreme caution. Use harness or cage. Most pet birds should NOT be free-flighted outdoors without professional training. Escaped birds rarely survive.
9. What treats work best for training?
Small, high-value treats: Millet, seeds, small nut pieces, dried fruit. Treats should be quickly eaten so training continues. Avoid toxic foods (chocolate, avocado).
10. Should I clip my bird’s wings for training?
Personal choice. Clipped wings prevent flight but don’t prevent training. Flighted birds can learn recall and benefit from exercise. Research pros/cons for your situation.
Related guides: For duck owners, see our call duck care guide or grey call duck guide. Nutrition matters — bird diet guide.